
Emergency Undelete to the rescue!
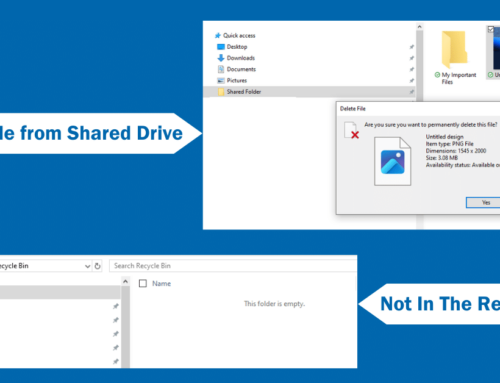
Here’s a nightmare scenario…a user accidentally deletes irreplaceable or valued files from a network share, and there is no way to recover the data because:
>The file was created or modified then deleted AFTER the last valid backup/snapshot was taken.
>There is NO valid backup or snapshot to recover the data.
>There was NO real-time recovery software like Condusiv’s Undelete® already installed on the file server
>Sending the disk to a professional data recovery center is COSTLY and TIME-CONSUMING.
What do you do? Well, you may be in luck with a little known feature in Condusiv’s Undelete software product known as “Emergency Undelete.” On NTFS (New Technology File system) formatted volumes, which is the default file system used by Windows, there is an unfamiliar characteristic that can be leveraged to recover your lost data.
Emergency Undelete
When a file gets deleted from a Windows volume, the data has not yet been physically removed from the drive. The space where that file data was residing is merely marked as “deleted” or available for use. The original data is there and will remain there until that space is overwritten by new data. That may or may not happen for quite a while. By taking the correct steps, there is an extremely good chance that this ‘deleted’ file can still be recovered. This is where Emergency Undelete comes in.
Emergency Undelete can find deleted files that have not yet been over-written by other files and allow you to recover them. To increase your chances of recovering lost data, here are some best practices to follow as soon as the files have been accidentally deleted.
1. Immediately, reduce or do away with any write activity on the volume(s) you are trying to recover the deleted files from (this means stop creating or editing files!). This will improve your chances of recovering the deleted files.
2. Get Condusiv’s Undelete to leverage its Emergency Undelete feature. Emergency Undelete is part of the Undelete product package.
3. REMEMBER: You want to prevent any write activity on the volume(s) you are trying to recover the deleted files from, so if you are trying to recover lost files from your system volume, then do one of the following:
a. Copy the Undelete product package to that system, but to a different volume than the one you are recovering lost files from. Run the Undelete install package and it will allow you to run Emergency Undelete directly to recover the lost files.
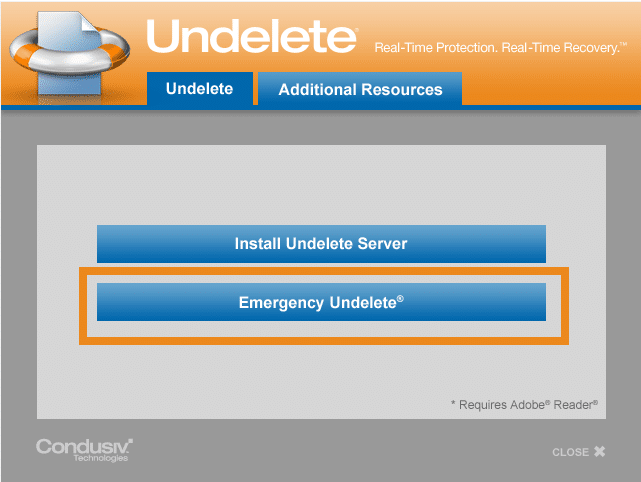
Select Emergency Undelete
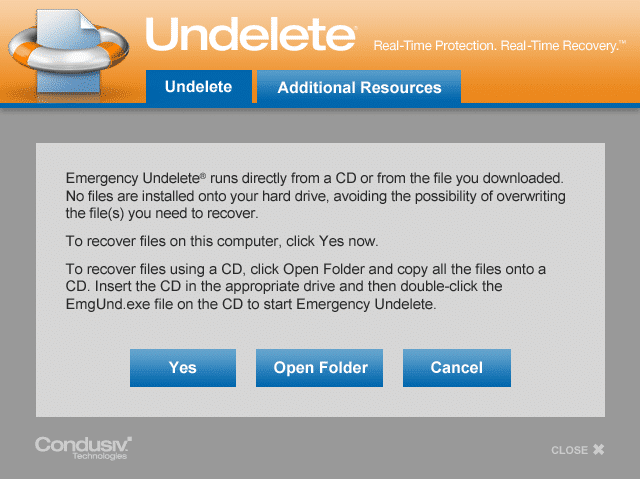
To recover files now, click Yes. To run from flash drive or CD, click Open Folder
b. If you do not have an extra volume on that system, then place the Undelete product package on a different system, run it and Emergency Undelete will allow you to place the Emergency Undelete package onto a CD or a USB memory stick. You can then place the CD/Memory stick on the system you need to recover from and run it to recover the lost files.
Now if the lost files do not reside on the system volume, you can just place the Undelete product package on the system volume, run it and select to run Emergency Undelete directly to recover the lost files.
4. When recovering the lost files, recover them to a different volume.
These same steps will also work on FAT (File Allocation Table) formatted storage that is used in many of the memory cards in cameras and phones. So, if some irreplaceable photos or videos were accidentally deleted, you can use these same steps to recover these too. Insert the memory card onto your Windows system, then use Emergency Undelete to recover the lost photos.
Emergency Undelete has saved highly valuable Microsoft Office documents and priceless photos for thousands of users. It can help in your next emergency, too.
Video: See Emergency Undelete in action


I've been investigating this issue for almost 3 weeks now and this really is the 1st posting that actually makes perfect sense. How come it's so difficult to gather effective guidance with regards to protection today? Certainly understand the energy you invested putting your thoughts into words so amateurs such as myself may take action. Maybe there is a part 2 for your article? Thank you again!
I have to express some thanks to you for bailing me out of this particular condition. Because of browsing through the world wide web and seeing recommendations that were not productive, I assumed my life was over. Living without the presence of approaches to the problems you have sorted out by way of your report is a serious case, and those that would have badly damaged my career if I had not discovered your blog post. Your personal mastery and kindness in touching the whole lot was vital. I don't know what I would have done if I hadn't encountered such a thing like this. It's possible to at this time look ahead to my future. Thank you so much for your impressive and effective help. I will not think twice to recommend the sites to any person who will need direction on this topic.
They can get better productiveness at work and they won't have to lose out on an experienced worker.