Condusiv Help Center
Help Center / Product Guides / Undelete Quickstart Guide
Undelete Quickstart Guide
Undelete recovers deleted files instantly, eliminating time-consuming restores from backup. Undelete protects local and network-share files ensuring every deleted file can easily be restored. Follow these simple steps to get started now.
Important Note: Emergency Undelete is a separate utility included with Undelete Server that can be used to recover accidentally deleted files before installing the full Undelete product. If you need to run the Emergency Undelete tool to recover accidentally deleted files and directory folders before you’ve installed the full Undelete product, we recommend that you review these more detailed instructions. Emergency Undelete is only available with the paid Undelete subscription license – it is NOT available in the trial software.
Please select the type of Undelete installation you will be doing:
BASIC INSTALL
STEP 1
Download Undelete
Download the software from the link provided or from “Downloads” within My Account. Save the file to the Downloads folder.

STEP 2

Install Undelete
To protect your server files, install Undelete on your server(s). Double click the zipped file in the Downloads folder, double click the application file, and once the Undelete screen appears click “Install Undelete Server”. No reboot is required.
Follow the steps displayed to install.

The Windows Recycle Bin has now been replaced by the powerful Undelete Recovery Bin. Deleted files will now be saved to Recovery Bin for instant recovery.
STEP 3
License Key
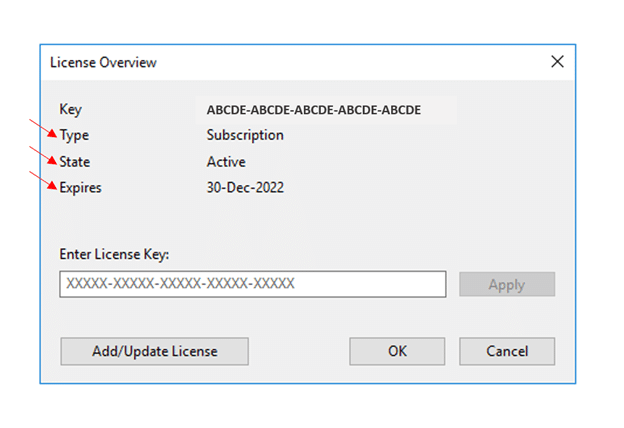
To enter your license key, double click the Recovery Bin icon on the Desktop or click the start button and type Undelete. This will launch Undelete and on initial startup, it will bring up the License Overview page where you can enter your license key.
Your license key is in “Subscriptions & LIC Keys” within My Account.
When your key has been successfully added, you will see the license Type, State, and Expiration fields are populated. Your system will need direct access to the internet in order to activate the license. You will not be able to recover documents from the Recovery Bin until the license has been activated.
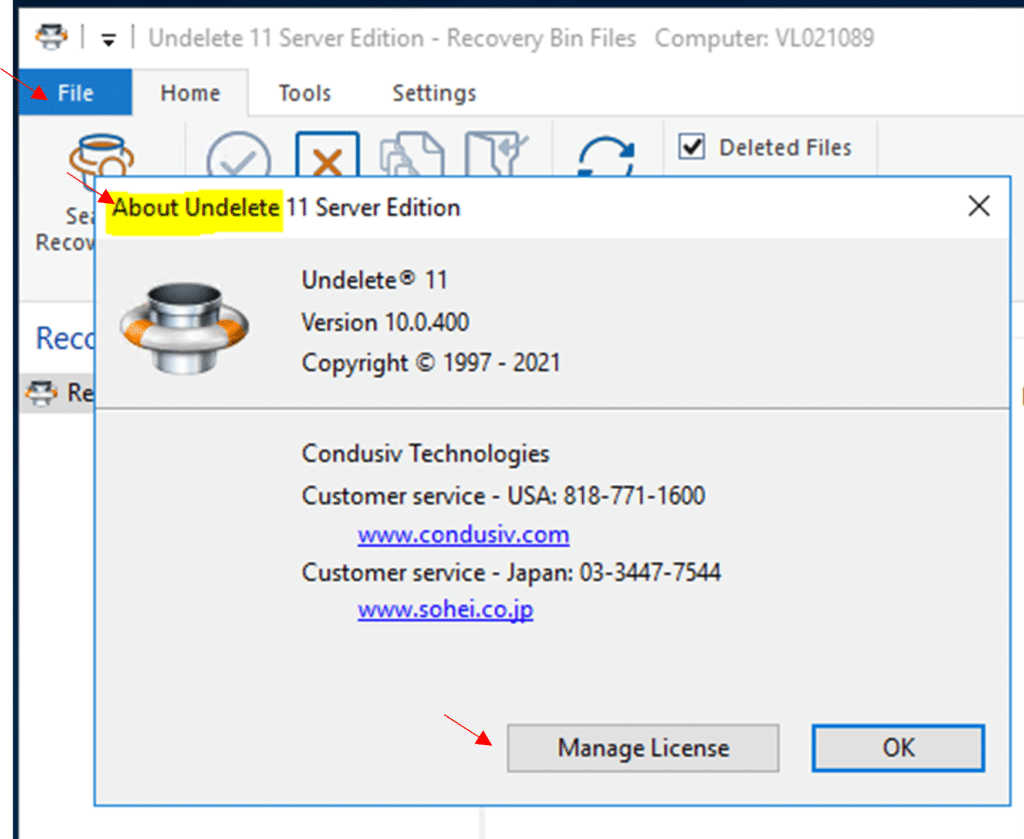
Another way to access the License Overview page is from the File → About menu:
STEP 4
Recover Files
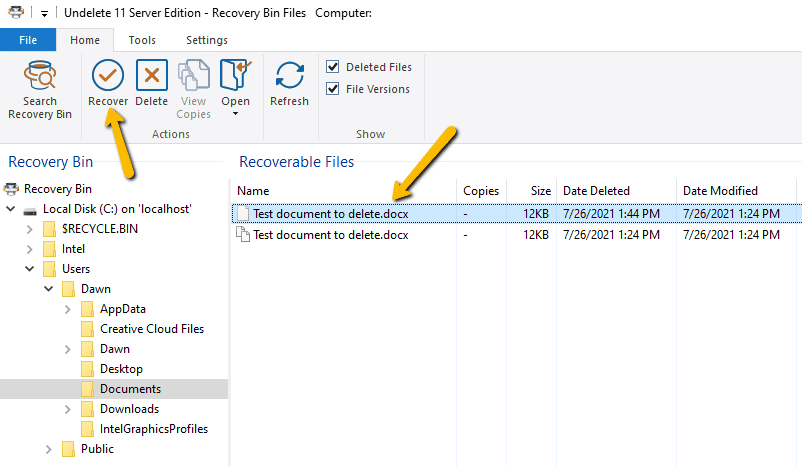
To recover a deleted file simply open the Recovery Bin, click on the file you want to recover, click “Recover”, choose where you want to recover it to, and click “OK”. The deleted file is now recovered, it’s that easy!
STEP 5
Adjust Settings and explore additional features
Undelete has many features and settings you may want to explore. Check out these short videos:
- Undelete file versioning
- Searching the Undelete Recovery Bin
- Inclusion and Exclusion Lists in Undelete
- Emergency Undelete Software
- How to safely delete files before recycling your computer with Undelete
To view the full Undelete documentation click here.
About Local File Protection and User Access
- To protect locally deleted files, plus give users access to recover their own deleted files on the server, install Undelete Professional on each Windows client system.
- To allow users to connect to and recover their own deleted files on the server only (no local deleted file protection), install the Undelete Client on each Windows client system.
UNDELETE SILENT INSTALL
The download package for Undelete will include one of these two packages:
![]()
- To do a silent install you will need to extract the x64 setup.exe files.
- Create a .key file and place it in the same folder as the setup.exe file.
- Place the .key file in the same folder as setup.exe and use these parameters to do a silent install: Setup.exe /s /v” /qn”
The download package for Undelete will include one of these two packages:
![]()
To extract the setup.exe files for Undelete Server, Pro, and Client simply install FullEnglishUndeleteServer. The setup.exe files are extracted and placed in the installation folder for Undelete.
Undelete does not require a reboot on install or uninstall.
An alternative to typing in the license key to activate the product is to use a .key file which is just a text file with the file type name changed to ‘key’ and contains the license key.
Undelete, DymaxIO, and CMC will pick up a .key file placed in the same folder as the setup.exe file and automatically license the product during the installation process.
Take these steps to create a .key file.
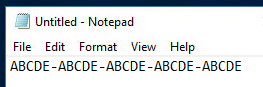
Open Notepad and paste in the license key.
Click File → Save As.
Change the “Save as type:” field to “All Files (*.*)”
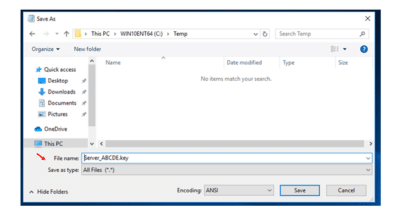
Name the file and give it a .key extension.
Place this file in the same folder as the setup.exe file and it will be picked up and automatically license the product.
Alternatively, if you need to install the key after installation, you can place the .key file in the product installation folder and restart the product service which will automatically license the product.
View PDF How to Create a .key File
UNDELETE PUSHINSTALL UTILITY
Undelete Server licenses include unlimited Clients and the Undelete PushInstall utility.
Locate Undelete PushInstall
Undelete PushInstall allows you to select specific computers in your domain and push install Undelete Client, Pro, or Server. Click on the Windows Start button to locate Undelete PushInstall.

NOTE: Undelete Push Install will not upgrade existing installations of Undelete. You will need to first uninstall Undelete. The data in the Recovery Bin will be preserved but the settings will not be preserved. If you need to preserve the settings, consider doing a local install of Undelete which does support the Upgrade option.
Instructions for uninstalling Undelete with the Undelete PushInstall utility are below.
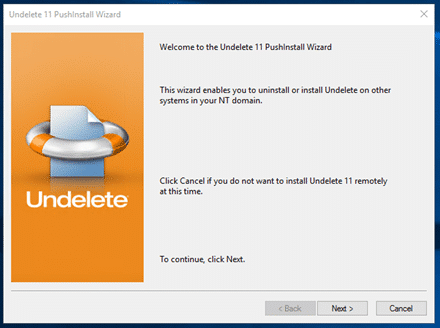
1. Launch Undelete PushInstall.
2. Select the edition and systems you want to install Undelete on.
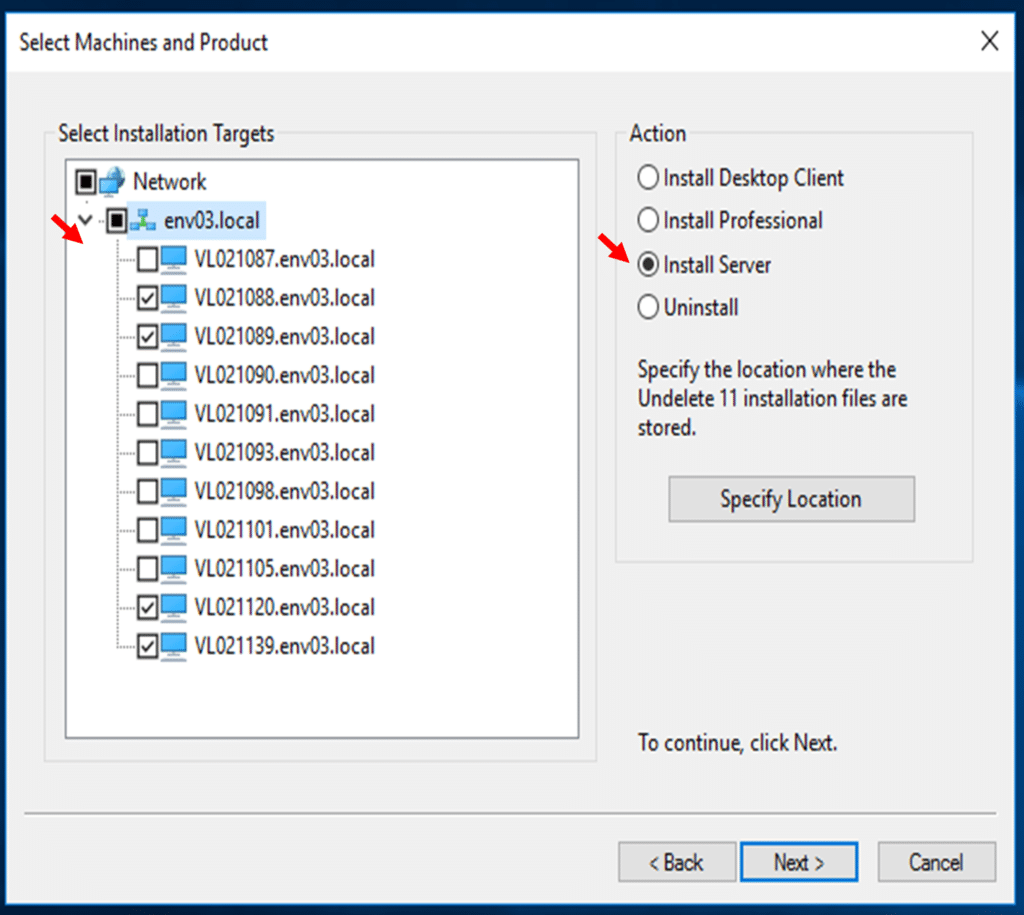
3. Enter your license key. (Undelete Client does not require a key.)

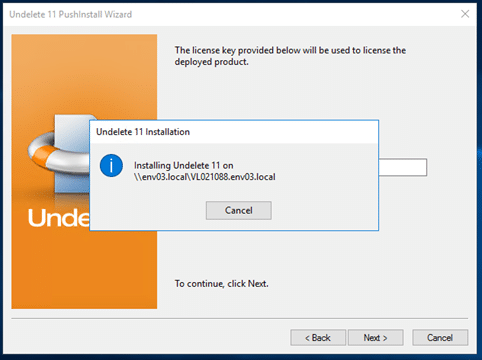
4. You will see that Undelete is being installed. The install process goes one system at a time and can take a bit of time if you are installing Undelete on multiple systems.
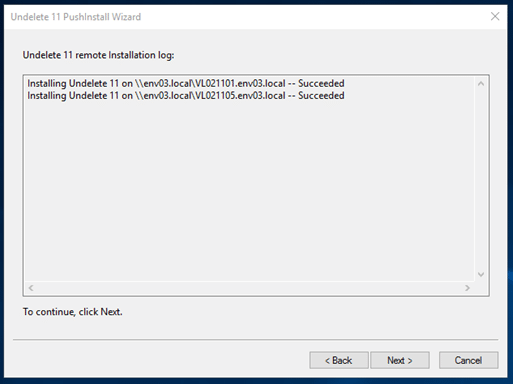
5. At the end of the job, you will get a report:
Uninstall Undelete using Undelete PushInstall Utility
1. To uninstall Undelete, launch the Undelete PushInstall utility and select the systems that you want to uninstall Undelete from. Then click the Uninstall option and click Next.
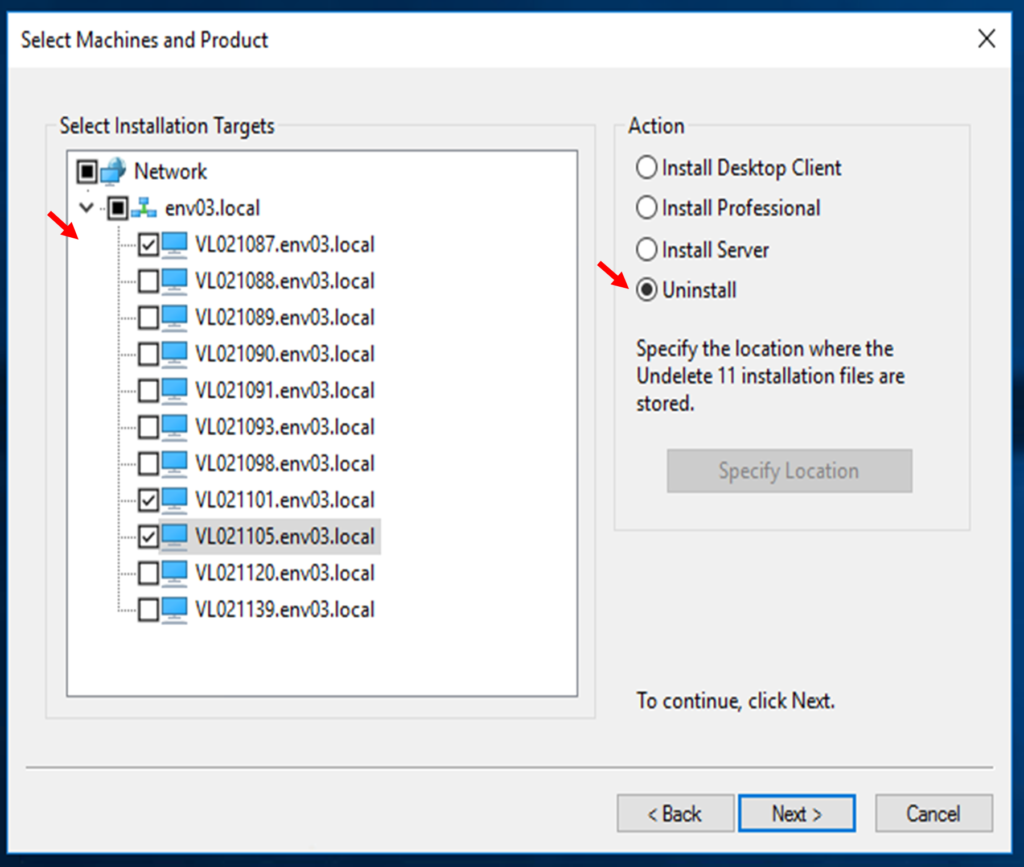
2. When the process is complete you will get a report like this:
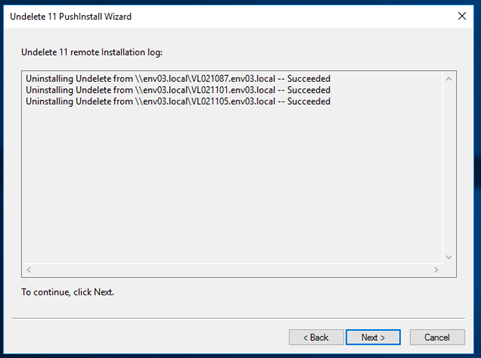
If the uninstall failed for any systems, please try again. The system may have been using the Recovery Bin and was unable to uninstall the product at that time.
Undelete Installation Quick FAQs
- Unlimited Undelete Clients are included with Undelete Server and do not require a Client license key.
- Undelete Pro and Undelete Server do require a license key.
- An Undelete Server key can activate both Undelete Server and Pro.
- Undelete PushInstall will not inform you that you have exceeded your number of licenses.
- An unlicensed\un-activated installation of Server or Pro will capture deleted files but you will not be able to recover files until the product license is active.
UNDELETE SERVER CORE INSTALL
The Undelete Server download package will contain this file: FullEnglishUndeleteServer.exe
If you try to install this on a Server Core system you will get errors.
To install Undelete on a server core system, you can either use the PushInstall utility that is included with Undelete Server and push the install from a system that has a GUI or you can do a local install using the setup.exe file for Undelete Server.
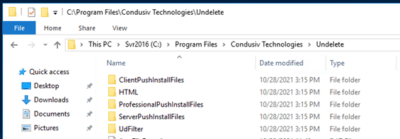
To locate the setup.exe file for Undelete Server, install Undelete Server on a system that has a GUI (Undelete Server will install on a Desktop OS) and copy this file over to the Server Core system →

Create a .key file and place it in the same folder as the setup.exe file, then launch setup.exe.
These are the parameters for a silent install:
Setup.exe /s /v” /qn”
An alternative to typing in the license key to activate the product is to use a .key file which is just a text file with the file type name changed to ‘key’ and contains the license key.
Undelete, DymaxIO, and CMC will pick up a .key file placed in the same folder as the setup.exe file and automatically license the product during the installation process.
Take these steps to create a .key file.
Open Notepad and paste in the license key.
Click File → Save As.
Change the “Save as type:” field to “All Files (*.*)”
Name the file and give it a .key extension.
Place this file in the same folder as the setup.exe file and it will be picked up and automatically license the product.
Alternatively, if you need to install the key after installation, you can place the .key file in the product installation folder and restart the product service which will automatically license the product.
View PDF How to Create a .key File
Managing Undelete on a Server Core System
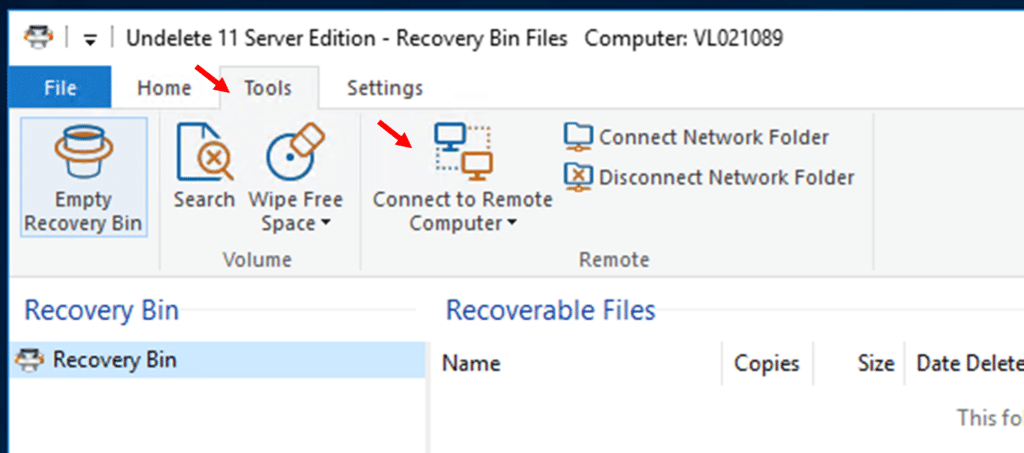
You can manage Undelete on the Server Core system from another Undelete Server installation.
On a system that has a GUI, double click on the Recovery Bin icon to launch Undelete. Click on the Tools tab and then “Connect to Remote Computer.”